Thursday, November 24, 2016

Seafall: A Tale of Three Provinces Prologue **Spoilers**

I'm going to be documenting our Seafall Legacy campaign! As a warning, I won't even remotely try to hide spoilers- this is for those who either don't care about spoilers or have already played through their own game. You have been WARNED!

____________________________________________________________________________


So far we have played through the Prologue, and the most fun thing to happen is the preliminary naming of many things- from provinces through ships and leaders. In our first game we also found out that raiding brings all the points, but we also know that in the future enmity will be an important (hopefully equalizing) factor... otherwise its going to be a really bloody dozen or so games.

The story thus far is three leaders were chosen, going out into the sea's for some exploring and exploitation... only for each of the three to be taken by strange dreams. Dreams forcing them to sail out into the unknown west.

And apparently... never come back.
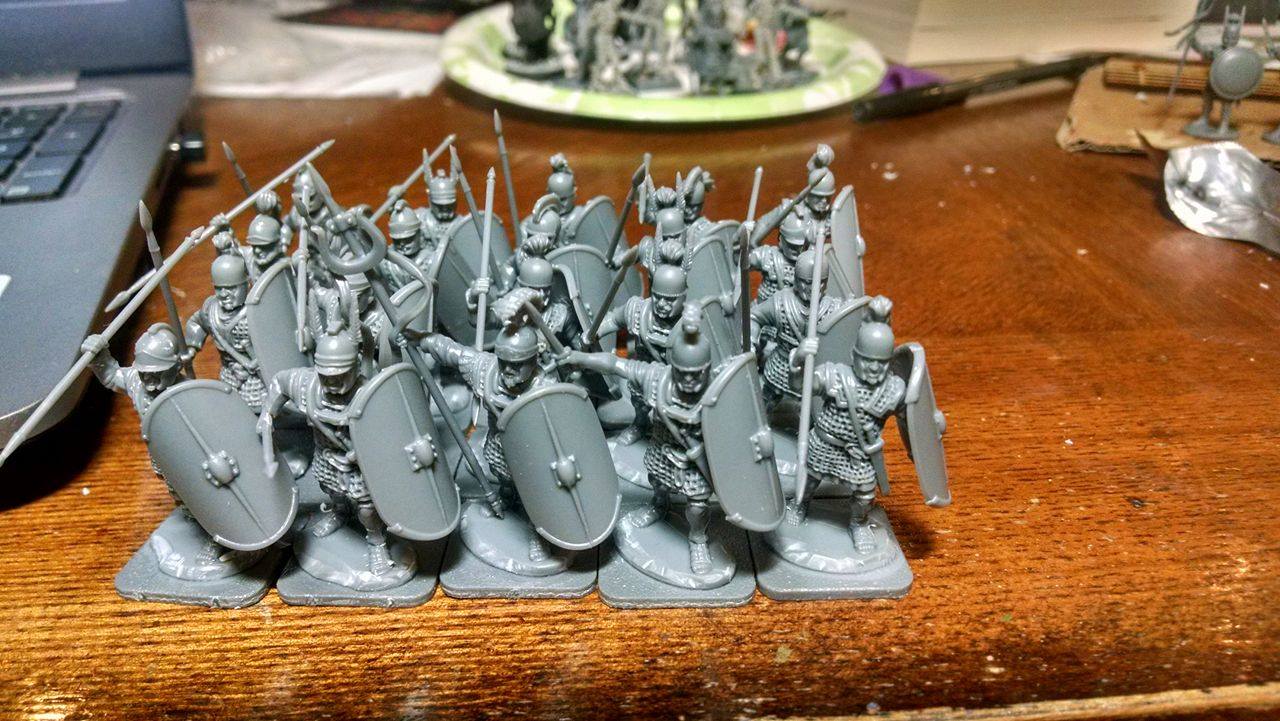
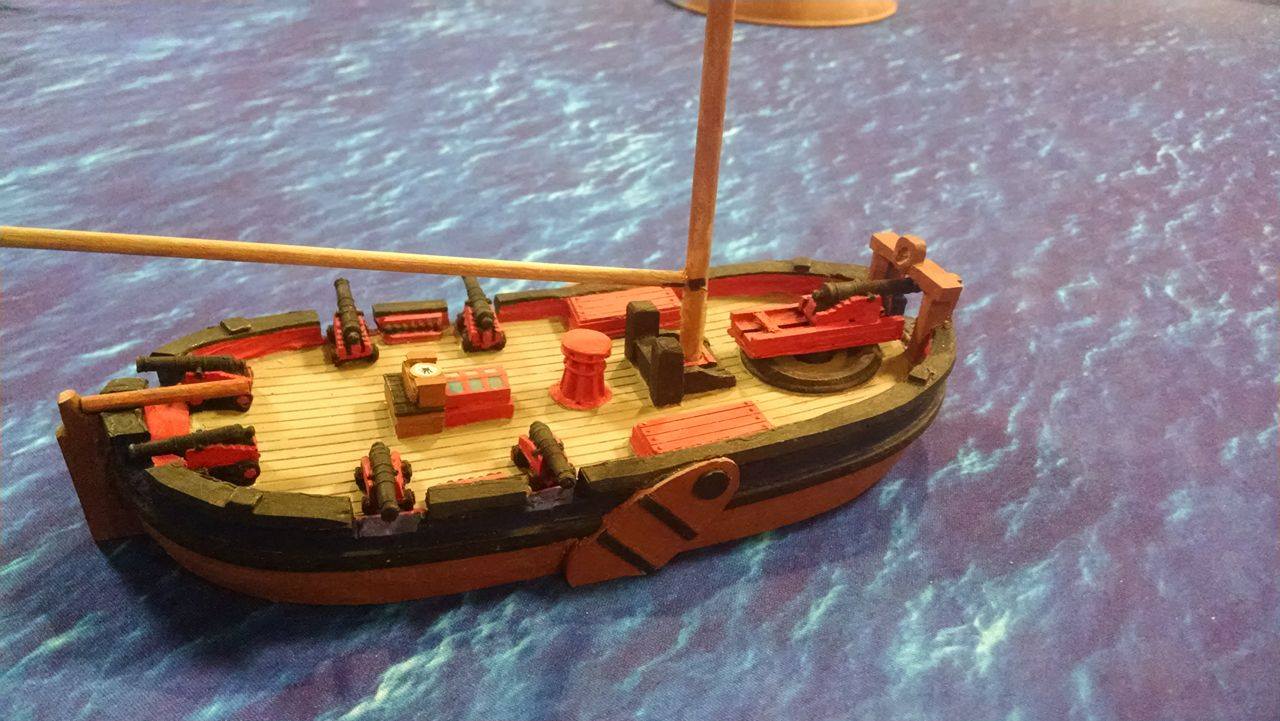
My faction of red! The Province port is known as 'Holystone'.

My brother's faction in the purple, Aegia! Province Port is 'Bastion'.

Dad's province of green, with a port named 'Ridgeport'.

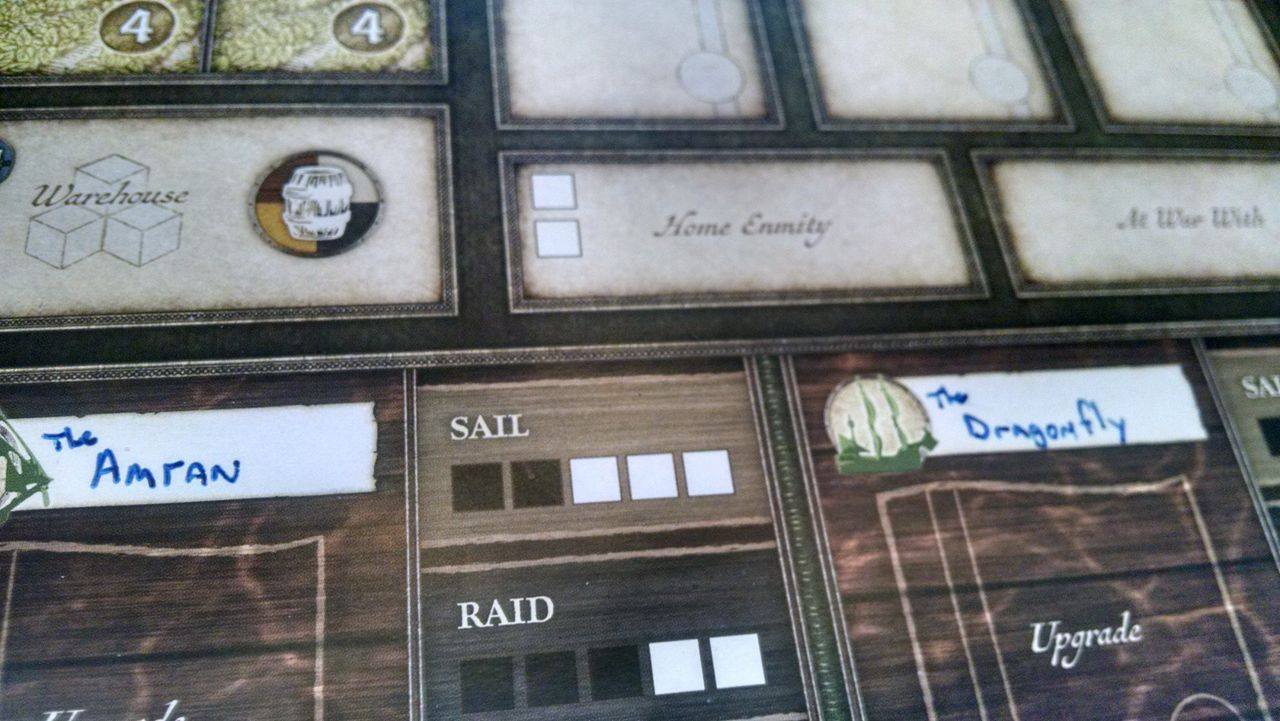
The green ship's names.

Aegia's leader on the left, Ilnea's on the right.

And my avatar for the game, Adelina of Baccanos.

Jeanette Schloss, former ruler of the Aegia province. She was known (in the prologue)
for dealing quite harshly with the natives before disappearing.

Elias Crane, the ruler of Ilnea. Rising from the worst poverty to the top station
in the country, Elias was a wise leader who was focused on discovering everything
the local island chains had to offer before disappearing.

Alphonse Alecto, brother to Adelina, was a veritable prodigy. Gifted with trade
and infrastructure planning, he was poised on the edge of making the Alecto House
the merchant powerhouse it was in the past... before the dream's led him to disappear
to the West.

All of the advisors named so far.

The islands on the right side of board...

... and on the left.
With our leaders heading out into the unknown, they are torn up... and motivations immediately begin to foment in our minds:

Adelina Alecto: The sister of the disappeared Alphonse, and new ruler of the Province of Baccanos. Suddenly left with a teetering merchant empire full of uncertainty and plagued with the rabid writings found in her brother's journal about a strange vision and an unknowable quest that took him away. She know goes west with a level head with hopes of finding her brother, and solidifying her families fragile power.

Dorian Endarian: Elias Crane was more than just the ruler of your province- he was a dear friend and mentor. You fought hard to take his position after he disappeared- his policies and dreams for the province must be defended from the ravenous legislature. Though... the dreams that he had of late were strange- what could be so important out west? He must know.

Marcus Schloss: To Marcus, his sudden ascension to ruler of his province came as a pleasant surprise. Legacy was all that mattered to his mother, and she raised him as such. Cold and even a little cruel, she assured that Marcus excelled in all things- but it also meant that few tears were shed at her disappearance. Unconcerned with his mother's fate, Marcus turns his eyes hungrily out west to claim the fame and legacy that he deserves- even if his laurels must be dipped in blood.

So, as we have our important characters, and not much else. It WAS just the prologue after all. Be sure to stay tuned for future updates and have a happy Thanksgiving!

Tuesday, November 15, 2016

MEPAcon, Painting Victories, and Warriors of Carthage Update!

Well, another con under my belt! This time its the convention that I've been going to the longest, MEPAcon, held in 'sunny' Scranton. My family has coming to this particular convention for over a decade, and over the years I have proselytized to as many friends and acquaintances as I can manage. It's always great fun, with some of the best people I know running and participating festivities- and I can't wait till the Spring already to do it again.~

My favorite local gaming convention in its 31st gathering! Best staff I know,
feels just like home- and getting bigger every year!

Gavlan Goldclaw- its your gold, and his claw~

Playing Loka at the play to win table. A pretty fun game~

I ran my first scenario of Greyhawk Reborn, which I co-authored and premiered
at the con. 'Seeing Hool's Out There' went off twice and we hope to run it again!

I spent a lot of time painting in the two weeks before the convention so that
we could showcase the first scenario of Conan: The Boardgame. I got it done,
and Conan was able to slice his way through a village of fully colorful bad guys.

There was also a Painting Competition! My Hunter Trio here took first
place in the 'unit' category!

Apparently everyone love's Predators... but personally I thank
the adorable little bugs. (I love those guys~)

In other non convention related news, my regiment of Punic War
Veterans are built.

I've carved down the edges of the individual soldiers bases, in the hopes
of making the bases appear at least a little more natural once based.

Also done are my twelve Iberian Cavalrymen.

One of the standard bearers and one of the officers might also by press-ganged
into a individual character role depending on the army list I decide on later.

Tuesday, November 8, 2016

Fall in! Battle Report: Skirmish in the New World

Welcome to the Caribbean, just as the local Dutch and British forces go to war. As the sides line up, even going as far to hire some dangerous pirates and privateer's to bolster their respective forces, the objectives are handed out, all aimed at forcing the players into a high stakes naval fight in the center of the board:

Capture the Spanish (Pirate-held) Fort to use as an invasion staging ground- 2000pts for the Dutch
Search for signs of the Brig HMS Badger, and rescue any remaining crew- 2000pts for the British
Take enemy ships out of action- Depends on the 'fleet' points per ship
Capture as much loot on islands as possible- Varies depending on the treasure

I was a Captain flying the Union Jack. In keeping with theme, I named my commander 'Tomasz Zielinski', Captain of the Brig 'Morning Star'. The Good Samaritan, as I took to calling him, couldn't help but cease the chance for treasure and glory in this skirmish.

I wish I had a more complete picture of this game, but regardless it was a
very grand scale play- ships across a lovely little island chain.


It was my first time playing Sailpower- and I was fairly impressed with
how seemingly versatile the system was.

The British starting area. My ship is the Brig five ships down the line.

Oh, look at that. Someone isn't QUITE as prim and British as the enemy
might think. I guess that 'Spanish' Fort might be friendlier than expected.

The game used an interesting way of movement. First we would all (independently) chart
our movement for the turn, and then we would place the paper near our ship to signal to the
DM's that we are ready to proceed.

The game's author and creator watching the game progress as the
Dutch forces advance up the table towards their objective. The big
wooden arrow is wind direction (and speed), while the chest holds the
possible treasure's that can be found exploring the islands.

As the British ships rush forwards to explore the islands near them, I send
out two longboats full of men to find what happened to be hiding there.

The 'Morning Star' caught up with the longboats just in time to find a few
tons of Rum, Wine, and gun powder apparently left lying around. Amazing
what twenty pirates can scrounge up!

The situation intensifies as two Dutch Gun Boats engage the British
forward elements.

Our game was interrupted by con staff to award the table with an award!
Sadly I can't remember exactly WHAT the award was for, but it certainly
seemed deserving of some recognition on scale alone.

The crew of the other 'British' (Pirate) ship in the fleet, this one much
smaller- and more dastardly.

As the Dutch get closer to their objective, my Brig sails directly on an
intercept course.

The mess intensifies as I move forwards, Dutch and English forward
units mingling and fighting up and down the Dutch side of the Archipelago.

However, we have a trick up our sleeves. Searching the grey rocky island, our other
Pirate player found a small cache of shore guns and a mortar- leaving crew to ambush
the Dutch when the fighting heated up to devastating effect.

*BLAM* They fire, scoring direct hits with heated shot on one of the
gun boats- though sadly the Mortar missed.

My ship takes a dangerous route, putting itself between the Dutch invasion fleet and
the pirate held fort. Luckily I managed to signal the gunners in the tower, who managed
to help me with their shore batteries- lending more death into the fray.

After two broadsides from my seasoned, veteran gunners has the gunboat
listing and burning, barely able to keep together.

In a last ditch attempt to salvage something, the Gun Boat manages to briefly
grapple my ship, sending hardened elite Dutch Marines over. Despite being
the clearly superior fighters, my numbers are just too many. Twenty out of
twenty four die in the initial fighting, and the remaining four are taken care
of in the following turn.

Even as my ship broke away to finally reach the sinking remains of the HMS Badger,
the mortar fired, landing a critical hit...

... on the remaining gun boat, sending what amounted to an air-burst along its
small deck, killing a good third of the crew and filling her with holes and fire.
In the end, the Captain of the doomed gun boat near my ship attempted to take me with 'em by lighting torch to his powder magazine, but my distance and size kept me from suffering truly crippling damage- and I was also awarded 300 odd points for its destruction. My ship and the other pirate docked successfully with the HMS Badger and saved a handful of survivors each (and one luxurious Persian Cat). My action blocked the Dutch from their objective, and we chewed them up as they tried to get around me- at the end of the day the fort remained in Pirate hands.

With 2,835 points by myself, it was a clear crushing victory for the British and Captain Tomasz in particular! Glory to Britannia, and god save pirates- finally, a victory!~

Monday, November 7, 2016

Fall In! Battle Report: Czarnowa 1666- Civil War

1666, a Polish noble is banished from the Sejm (Polish Congress). Not taking this particularly well, he gathers a confederation (a Polish legal fiction to avoid the harsh if deserved label of  'rebellious traitorous scum') of disgruntled nobles- in effect, bringing civil war to Poland. So now the advance units of Rebels and Royalists clash in the small village of Czarnowa- can the Royalists break the back of this rebellion before it even begins? Or will the overworked and underpaid Royalist forces find themselves without the proper motivation to match the zeal of these 'freedom fighters'?

I took the command of one of the three Royalist elements. Rules are using a Computer moderated Carnage and Glory Pike and Shot rule set.

The Rebel forces before deployment, 'advancing' on the village that
they will be holding against the Royalist advance.

Main village compound- decidedly NOT cavalry territory.

The Royalist Banner's, tasked with driving the blasted traitors from
the village and breaking the back of this confederation once and for all.

Specifically my three units of Poles- two banner's of (underpaid) Pancerni and
a well-equipped (if less veteran than I'd like) banner of Hussars.

The second commander (703) is who I represented. My buddy took command of the 'A' team,
while an experienced third player took command of the light horse and overall commander.

Rebel infantry and dragoons taking cover in the buildings of the town
and a pair of heavy War Wagons.

Traitor cavalry on come down from the village's east side, sweeping
down to intercept the Royalists on the right flank.

Choosing to ignore the bridge in favor of the wider frontage of the creek, two elements
of the Royalist forces (3rd light horse followed by 1st) leave column to form into line even
as the enemy does the same.

My forces are charged with delaying the enemy reinforcements coming from the town,
giving enough time for the Royalists on the right flank to overwhelm the enemy.

Overestimating the damage the enemy cannons could deal, I charge a Rebel
2 pounder in the center of the village, moving my Pancerni into a dangerous
position.

They wipe out the cannon, but expose their flank to the danger of being charged.

Even as my own cannon element sets up, I am forced to send my second element
of Pancerni to charge even further to intercept the enemy cavalry.

On the other flank, this get very messy as the Rebels gain the initiative, forcing
the Royalist cavalry to be the ones charging across the creek.

Even though our numbers are overwhelming on this flank, the strategy imparted by our
'experianced' overall commander falls apart as his first wave is locked in combat, stranding
our heavy veteran's behind to watch and wait for far too long.

Even as my Hussars and Pancerni enter the fray, my intrepid 'cannon killers' move
around to cover my flank. Again our experienced commander advises me to not worry
about the infantry, and instead turn to support my other cavalry elements in combat...

Which turns out to be a terrible mistake as the Rebel infantry break doctrine
(and cover) to encircle my forces- exacerbated by my inability to break through
the enemy cavalry to the front.

Add caption

My Hussar's are abandoned as musket fire peppers the units behind, forcing them to
withdraw. I wish I could pull them out, but without support they would be cut piecemeal
by a rear charge- so they could only charge.

My 'brave' Pancerni racing each other to be the first over the river as they flee
the Rebel onslaught.

My Hussars fight to a painful draw even as the rebel dragoons charge my cannon.
The cannon's final grapeshot does enough damage to make sure that, even as they
are forced to abandon the cannons, these particular dragoons would spend the
rest of the game retiring to greener pastures.

Managing to (barely) escape the stranglehold, my Hussar's dig in against the creek even as
my Pancerni continue to flee. Over on the right flank the Royalist's FINALLY start to break
through- too late to have any hope of salvaging the left flank.

Exhausted and battered, my Hussars make a final stand against the horde.
They put up as good a fight as expected, but can't possibly hope to do anything
more than briefly delay the enemy.

On the left flank our veteran Hussars finally manage a charge on the
filthy traitor Hussars, the overall Rebel commander supporting them
while the element commander personally led the Royalists.

In what would be the last notable combat of the game, the Royalists smash the rebels. The
Royalist commander is captured in the fray, but the rebel overall commander suffers a
mortal leg wound- quite a blow to the Rebel's!
Despite that final resounding success, and the Royalist forces ready to stream in on the right flank, the battle would end there in a Rebel victory. 68% of the Rebel forces were still combat capable in contrast with the barely 60% of the Royalists, and with my force on the left flank smashed to pieces the DM declared that the Royalist forces would be forced to withdraw, leaving the village in dastardly Rebel hands. Still, the death the Rebel commander would be enough of a blow to allow the majority of the Royalist's to escape and gather their forces. Till next time traitors...

So one almost draw, and one solid defeat. Will I win anything this Fall in? Find out in the last installment, coming to a blog near you~